


What is Mikrotik Hotspot ?


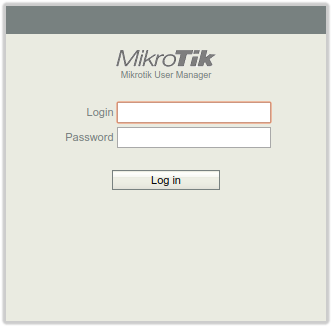
Mikrotik Hotspot login Page With USERMAN
MikroTik Hotspot is a captive portal solution that allows you to create a public hotspot or a wireless access point with a login page for WiFi users. It is a software-based solution that can be installed on MikroTik routers, allowing you to manage and control user access to the internet.
With MikroTik Hotspot, you can create a login page where users can authenticate themselves before accessing the internet. You can also set up user accounts and define the internet usage quota and time limit for each user. This makes it a great solution for public WiFi hotspots, such as in cafes, hotels, airports, and other public places where you want to offer WiFi to your customers.
Additionally, MikroTik Hotspot provides features such as traffic shaping and firewall rules, which allow you to prioritize and restrict traffic to specific websites or applications. This helps you manage your network and ensure that your users have a smooth and secure internet experience.
Now lets see how can you config Mikrotik Hotspot
Configuring a MikroTik hotspot involves a series of steps. Here are the basic steps to set up a MikroTik hotspot:
- Access your MikroTik router using Winbox or Webfig.
- Create a new hotspot profile by going to the “IP” menu and selecting “Hotspot.” Click the “Profiles” tab and then click the “Add New” button.
- Configure the hotspot profile settings. You can set the login page, user authentication, data limits, and more.
- Set up the hotspot server by going to the “IP” menu and selecting “Hotspot.” Click the “Servers” tab and then click the “Add New” button.
- Configure the hotspot server settings. You can set the hotspot interface, the IP address pool, DHCP settings, and more.
- Create a hotspot user by going to the “IP” menu and selecting “Hotspot.” Click the “Users” tab and then click the “Add New” button.
- Configure the hotspot user settings. You can set the user’s login name, password, and other options.
- Finally, enable the hotspot service by going to the “IP” menu and selecting “Hotspot.” Click the “Servers” tab and then click the “Enable” button.
Once you have completed these steps, your MikroTik hotspot should be up and running. You can then connect to the hotspot with a Wi-Fi device and enter the login credentials you created to access the internet.
Lets know about Mikrotik User Manager aka USERMAN

Mikrotik USERMAN is a user management system developed by MikroTik, a Latvian network equipment manufacturer. It is a powerful and flexible authentication and accounting server that allows network administrators to manage user accounts and control access to network resources.
Mikrotik USERMAN provides various features, such as user authentication, authorization, and accounting (AAA) services, which enable network administrators to create, manage, and authenticate user accounts, limit users’ access to network resources, and track their usage. It also supports various authentication methods, including username and password, RADIUS, LDAP, and Active Directory.
Furthermore, Mikrotik USERMAN allows network administrators to create different types of users, such as prepaid users, postpaid users, trial users, and hotspot users, each with different access levels and billing options. It also provides various billing features, including online payments, invoicing, and voucher-based authentication, which enable service providers to bill their customers for network usage.
Overall, Mikrotik USERMAN is a powerful and feature-rich user management system that provides network administrators with the tools they need to manage user accounts, control access to network resources, and bill their customers for network usage.
Now Config Mikrotik User Manager with Hotspot
Configuring the Mikrotik User Manager with Hotspot requires a few steps, which we will outline below:
- Set up the Hotspot: To set up the Hotspot on your Mikrotik router, follow these steps:
- Go to the IP > Hotspot menu and click the Setup hotspot button
- Set the interface to the one you want to use for the hotspot
- Configure the DHCP server settings for the hotspot network
- Set up the hotspot profile, which includes settings like the login page, authentication method, and session timeout
- Enable the hotspot service
- Install and Configure the User Manager: To install and configure the User Manager on your Mikrotik router, follow these steps:
- Go to the Files menu and create a new folder named “user-manager”
- Download the User Manager package from the Mikrotik website and upload it to the user-manager folder
- Install the User Manager package by going to the System > Packages menu and selecting the user-manager package
- Go to the IP > Hotspot menu and click the User Profiles tab
- Click the Add New button to create a new user profile
- Set the User Profile Name, Rate Limit, and Authentication/Accounting parameters as desired
- Click the Apply button to save the changes
- Configure the Hotspot to Use User Manager: To configure the Hotspot to use the User Manager, follow these steps:
- Go to the IP > Hotspot menu and click the Servers tab
- Select the hotspot server you want to configure and click the Edit button
- Go to the Login tab and select the Use RADIUS checkbox
- Set the RADIUS Server IP address to the IP address of your router
- Set the RADIUS Secret to a secure passphrase that will be used for authentication between the hotspot and the User Manager
- Click the Apply button to save the changes
- Create Users and Groups in User Manager: To create users and groups in the User Manager, follow these steps:
- Go to the Users tab and click the Add button to create a new user
- Set the User Name, Password, and other desired settings
- Go to the Groups tab and click the Add button to create a new group
- Set the Group Name and other desired settings
- Assign users to groups by going to the Users tab, selecting a user, and clicking the Groups button
- Select the group(s) to assign the user to and click the OK button to save the changes
That’s it! With these steps, you should be able to configure the Mikrotik User Manager with Hotspot.
Mikrotik Non Payment Reminder PPPOE/Hotspot – NerdEan’s Lab
If you’re setting up an internet connection in a public place, such as an office, then you may need to set up a Mikrotik Hotspot. Hotspots are networks that are usually open to anyone in the vicinity. By setting up a Mikrotik Hotspot, you can monitor and control access to the connection, as well as assign user accounts and passwords to those who need access.
In this article, we’ll discuss the steps required to set up a Mikrotik Hotspot with USERMAN. USERMAN, short for User Manager, is a solution developed specifically for Mikrotik Hotspot networks. The main features of USERMAN include user authentication, session management, accounting, and billing.
To begin configuring a Mikrotik Hotspot with USERMAN, you’ll need a few key pieces of information: the IP address for the router, a login and password, and a license or authentication key. Once you have this information, you can proceed with the setup.
The first step is to log into the router portal. The portal is usually accessed by typing the IP address into the address bar of an internet browser. The login page will prompt you to enter your authentication key, username, and password. Once you’ve logged in successfully, you can proceed to the next step.
The next step is to configure the USERMAN settings. In the Mikrotik dashboard, navigate to the ‘Hotspot’ tab and then select ‘User Manager’. Here, you will find the USERMAN settings, where you can configure various options for the router, such as setting up users and passwords, assigning user accounts, or setting access rules.
Once you have configured the USERMAN settings, you can proceed to the last step: activating the Hotspot. To do this, you will need to go to the Hotspot tab and click the ‘Activate’ button. This will enable the Hotspot and allow users to connect to the network.
Configuring a Mikrotik Hotspot with USERMAN is a relatively simple process. By following the steps outlined in this article, you should be able to quickly and easily set up a secure and reliable network connection. With the appropriate settings in place, you can ensure that only the right users have access to the network, while also taking control over managing and tracking all user activity.

